Encyclopedia Page Silhouettes

Black silhouettes printed on book pages – I LOVE THEM!  I saw the photo below on The DIY Showoff‘s Pinterest board and knew immediately what I wanted to do…

Ok, I’ll admit…. my eye was drawn to the horse… but I wanted to put my own spin on it. MY HORSE! …and then I took it a step further….  actually… THREE steps… Roxy, Quinn and Emma…

….if my house weren’t already a dog/horse shrine… I’d say it is now. Definitely going to have to swap out some artwork in the GALLERY WALL now!

Here’s a breezy run-down of how they came together.

Step One – Cut out pages from $3 thrift shop Encyclopedia

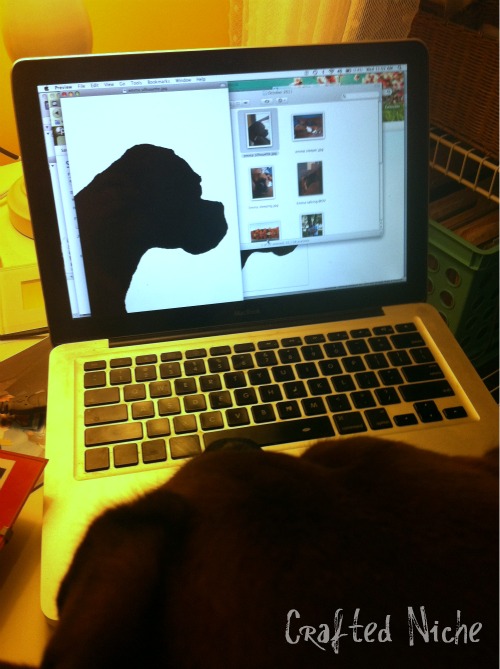
Step Two: Edit photo using Picnik (free subscription will do just fine!).  Here’s the full run-down on how to do this step.

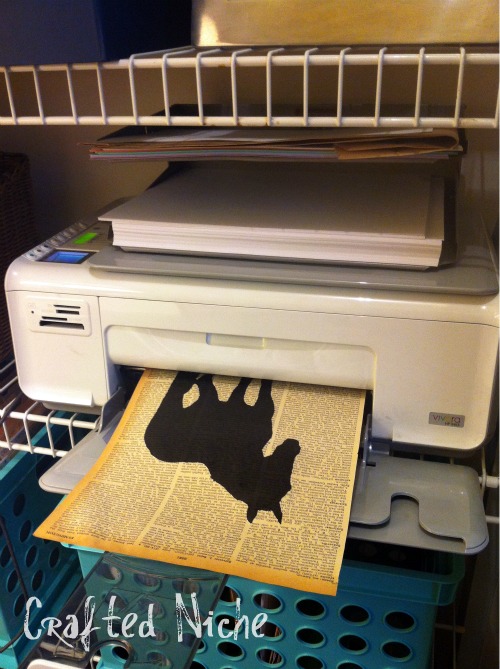
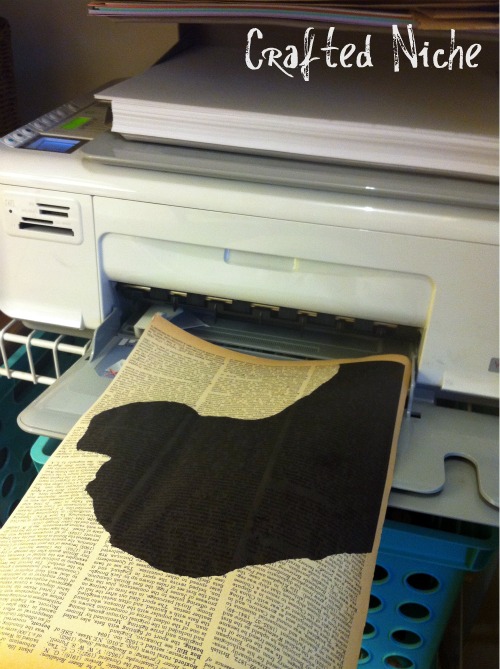
Step Three(ish): Trim paper to standard size and print image directly onto encyclopedia page.

Step Four: Repeat process… under the scrutiny of your next subject. Yes… Emma crawled into my lap just as I was getting ready to print hers!

I put a little thought into the pages I chose for each pet. My horse is named Sylvester, so naturally I chose the page with his name right on it!

…for the dogs I wasn’t as lucky. Unfortunately, Emma, Roxy and Quinn weren’t listed in my encyclopedia… so instead I used Boxing (for the Boxer), Labrador (pretty self explanatory) and Terrier (for Foxy Rox).

…and in case you’re wondering… here are the original photos:

….and my “after” silhouettes!  I tried to find pictures with easy to define outlines. Turns out squirrels in the front yard make the perfect distraction for labs and boxers while you take pictures of them!

…and at this point, I was GIDDY EXCITED. My sisters received immediate texts of the photo above accompanied by “eeeeek!”  Yup…. THAT excited.

Now I will say, this post is more of a reveal than a How-To… but I’m MORE THAN HAPPY to share the nitty gritty if you’d like to make your own. Just leave a comment and let me know! I’ll GLADLY do another post that walks you through exactly how I made the silhouettes using Picnik.com!   UPDATE – THE PICNIK.COM HOW-TO IS NOW UP AND AVAILABLE!

I bought $5  11×14 frames at Walmart that came with an 8×10″ mat. PERFECT!  Now they sit happily on my ledge (from the Board and Batten) and I swoon when I see them.

Here’s a couple more shots of the dining space’s progress.

(Chair Makeover Here, Table Makeover Here, Board and Batten Here)

…and that air vent.  YEAH…. I’m working on that. Right after these pictures were taken I PROMPTLY removed it and am currently working on it to make it disguise a bit better.


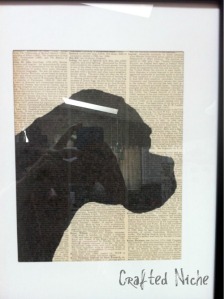
…note to self, take close-up photos BEFORE placing the prints behind glass next time. Glare! Grrrr

I hope you love them as much as I do!   Remember – if you want more info on the nitty gritty of the picnik.com steps, check this out.  I promise – it’s easy!

Hope everyone had a GREAT weekend. I’ve been working hard on building a banquette seat in the corner of my dining area and seriously can’t wait to show you. Give me a few days though… still have to finish trimming and painting and then recover the cushions.

…and as always, if you decide to make your own silhouettes I would LOVE to see your version!  Send me a link to your post or even email me a photo – craftedniche{at}gmail{dot}com  Who knows… maybe we should start featuring some of them HERE to help get people’s confidence and creativity going!

Be sure to check out all the great Link Parties where I’m linking up!

…and big thanks to Home Stories A2Z for hosting!

Amazingly featured at:

They are talking about me at CraftGossip.com


Joining the fun in the Fall Pinterest Challenge!

Big thanks to the following blogs for creating such a GREAT challenge!

Sherry @ Young House Love
Katie @ Bower Power
Ana @ Ana White
Erin @ House of Earnest

Board and Batten FINISHED!

Just in case you missed the beginning of this (overly long… I’ll admit it) story, you can check out Part 1 Here.

I woke up bright and early Sunday, went to the store to by a few more tubes of caulk and GET STARTED. Here’s a peek at the products I used on Saturday to attach the boards (in addition to nail gun) and caulk the gaps.

I made SUCH  a mess with the QuickDry Caulk on Saturday night. I’m sure it’s just me and that it’s a perfectly good product… but I did SO much better with this one that I purchased for a couple bucks on Sunday at Wallie world.

The tube is sitting on the newly caulked ledge. All in all I probably spent a couple hours caulking allll 15 battens, the horizontal boards and the ledge. I’m sure it could have been done faster, but I’m a newbie. Slow and steady wins the race. 🙂  Also… I got sick of walking to the sink for damp paper towels… a couple minutes in I wisened up and grabbed a plastic bowl of water, a roll of paper towels and a wallie bag to toss the messy ones in. Yup… I made THAT MUCH of a mess!

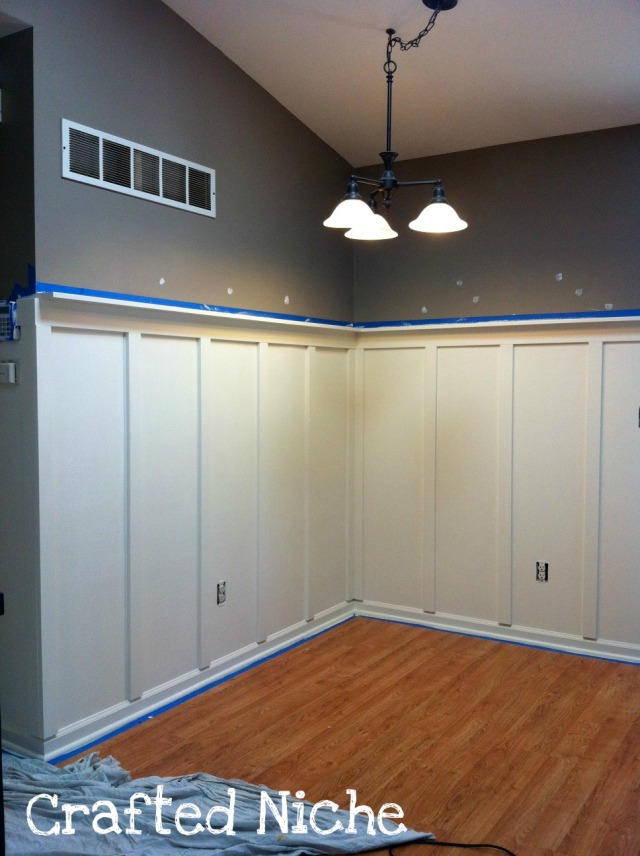
Monday morning I taped off the grey wall and slapped some white paint on my new walls/trim! Thankfully the former owner left me a FULL gallon of paint to match the existing trim throughout the house. Perfect!

By this point I was having baseboard remorse.  Originally I was going to pull off the existing baseboards and replace it with a flat MDF board to match the others. I started to worry that the next owner might not like my B&B… and thought I should stick with the existing baseboards…… fail. Don’t get me wrong… I still L.O.V.E. the new look!… I just can’t help but think it would have looked better with a simple baseboard.  Have no fear though.. I think it will blend much better once I get around to building the banquette seating for the corner.

While the white paint dried I broke out my grey paint to touch up my spackling spots. At this point I was completely giddy!

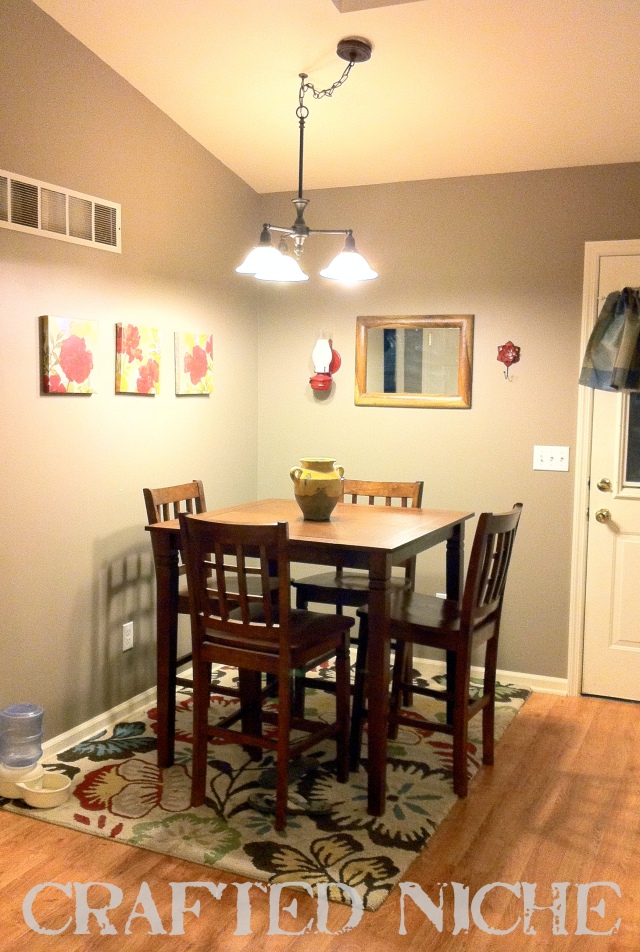
Just for fun…. Here’s what this space looked like Saturday morning….

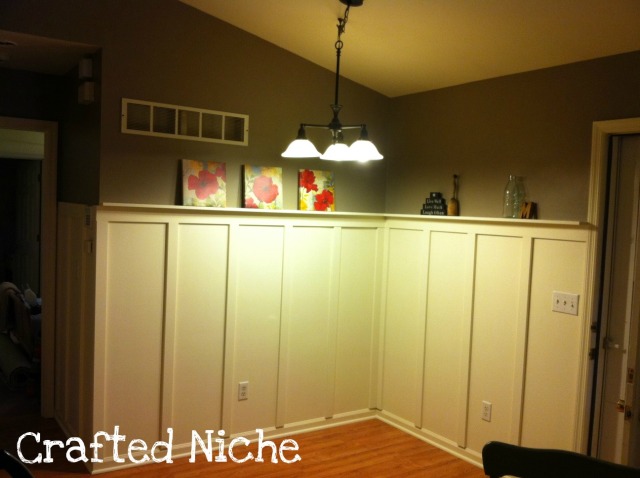
….and here she was come Monday night!

It still needs some more thoughtful accessorizing and I can hardly wait to show you the table!  I also finished it this weekend! eeek! Yup, I just squealed in excitement. I went there.  Cheers to three day weekends and DIYpaloozas.

Is it bad that I’m already dreaming up decor ideas for the ledges? I don’t have a mantle…. but I can make do with these bad boys!


Joining the party at:


Board Outta my Mind!

My Saturday plans for a day-long horse thang fell through so I woke up and firmly planted myself on the couch. I sat there for all of about 10 minutes before deciding I Could. NOT. spend my day like that! Staring into the kitchen I decided to dive right in and FINALLY tackle the Board and Batten I’ve been dreaming of.  …and O.M.G.  As I sit here Monday night, I couldn’t be happier!

Enough rambling… lets dive in! I consulted my favorite B&B how-to posts here and here to drum up some courage.

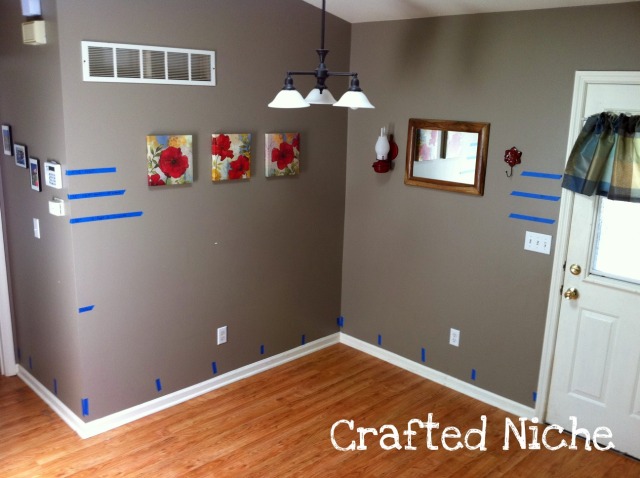
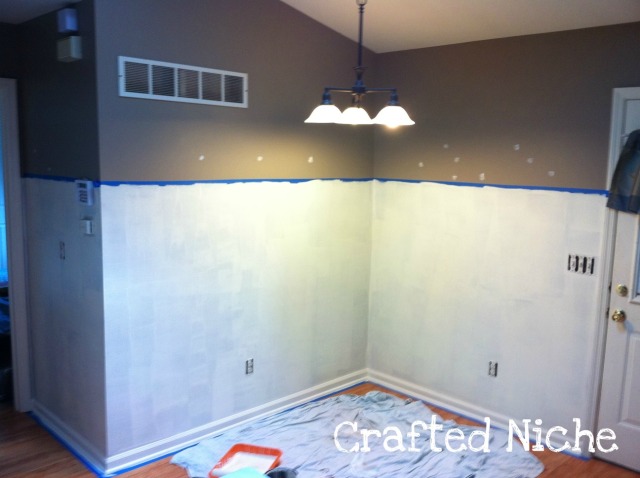
So I jumped off the couch, cleared the table and chairs out of the room, rolled up the rug and grabbed some painters tape. First decision was how tall to make the B&B.  My first thought was 48″ so that I could get two vertical boards out of each 8′ board.  Second thought was 5′ tall because I’ve seen that many times. …and the line in the middle (photo below) was an attempt to go UNDER the alarm system. That was the hardest part… finding a height that would avoid the thermostat and alarm panel. Impossible. Trust me… I tried.  If I went any higher my pictures would be hidden behind the light fixture!

The blue tape 1/3 of the way up the wall on the left is the table height. I thought it would help me picture the B&B in relation to the table height. Also, the vertical snippits of tape were to plan out where my battens would be placed. 16″ seemed to be the perfect distance!

Off to Blue to do some shopping! I decided to use MDF pre-primed boards for this project.  Any time I can skip priming I’m ALL for it! I bought 2.5 inch boards for my vertical battens and 3.5 inch boards for the horizontal top board and shelf/ledge. Also snagged a tube of caulk and 2 tubes of adhesive. Game on!

I’d like to personally thank whomever was responsible for designing the Mercury Mariner. It is the PERFECT length to accommodate my 8′ boards!

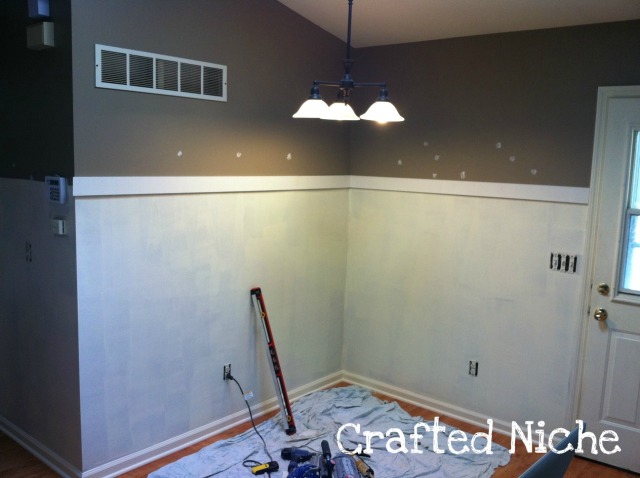
Once home, I marked my TOP board height and ran a strip of tape around the room under where that board would be nailed.  You’ll see in the pic below I decided to try to line up the top board with the top of the alarm panel. I couldn’t go above the panel because it has a tab that pulls up a good 5 inches.  I also removed the plates and spackled all the existing nail holes. Get used to those white spots… they’re going to be there for most of this DIY update!

No turning back now!  There’s no way I was going to repaint the wall grey.  No choice but to move forward.

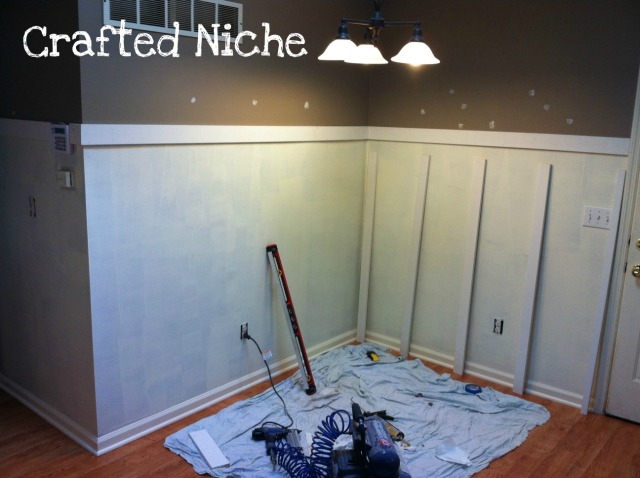
Have I mentioned how much I love my miter saw?  L.U.V. it!   Each board was glued and nailed to the wall. Unfortunately I don’t have any pics of the boards while they were going up.  …but you should have seen me STRUGGLING with that top board on the left. It was just long enough to not be able to balance/press it to the wall with one hand while also holding the level AND the nail gun. Lets just say I shoved my cheek up against the board with the level right at my eyeball… left hand stretched out to adjust the board and right hand with the nail gun. I should have been a juggler!

Eeeek! At this point I was SO excited!

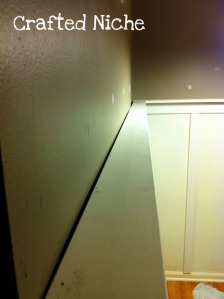
Sorry about the poor pic quality!  It’s so hard to take pictures in this room! Here you can see the cut I made for the corner (and my wam-bam primer job around the alarm panel).

Note my highly technical measurement strategy above.  Basically stretch out the tape measurer and just eyeball it for 16″.  Yup… that’s how I roll.

TIME OUT!

At this point my nail gun stopped working. GASP! PANIC! (cry in frustration) SCREAM! (just a few tears)  I was out of nails and it was a half hour down to Blue to buy more. Noooooooo!  Everything was going so quickly. Until now. Dang it! It was about 5pm on Saturday night and I was ready to throw in the towel and admit Nail Gun Defeat. I made one last ditch effort and ran out to the shed to search for nails.

Wait… WHAT! I have a second nail gun! How did I forget this?  Don’t let my roots fool you, I really am a blonde sometimes. It’s a finish nailer though rather than a brad nailer and still new in the box. Oh what the heck… why not give it a go. Crisis averted.

TIME IN!

I slapped up the rest of the vertical boards and then added the ledges. Oh how I heart the ledges. They were glued and nailed (a lot) along the top board.

I thought my walls were straight and flat…. right up until the shelf boards went up. Reality Check!  I had to do some serious caulking to fill these gaps!

Whoops… should probably remove that sticker! The rest of Day One (which was now NIGHT One) was spent caulking…. right up until I ran out. Duh.  Dana… you’re going to need more than one tube. Lesson learned!

Here’s where the project stood at the end of the night…

Hope everyone had a great Labor Day weekend! Just wait til you see what I tackled on Sunday and Monday!  I’ve been a busy, busy girl!