Moving CraftedNiche.wordpress.com to CraftedNiche.com

Hey guys!  I’ve decided to bite the bullet and move the blog to a self-hosted site….  I’ll now be making my home at CraftedNiche.com    I really went back and forth on whether to do it or not, but there were so many limitations and “features” that were unavailable to us at craftedniche.wordpress.com

The good news – I’ll be able to personalize the site and have more control over everything.

The bad news – I can’t seem to find a way to re-subscribe FOR you at the new domain.  😦  Frown Town!

To Continue Following Crafted Niche:

I really, really, truly, hope that you will still want to follow along in my DIY trial and error.   To continue following Crafted Niche, just do these two super simple things:

  1. CLICK HERE and enter your email address.
  2. Check your email and click the confirmation link you’ll receive by email.

Simple as that!    If you have any trouble with the link, you can also visit the new CraftedNiche.com and subscribe by email in the top right hand corner. Both links take you to the same place!

I have so many things planned for the near future and I hope that you’ll want to be in on the fun. PLUS – My sister Christy is going to start contributing on a regular basis and I think you will absolutely LOVE what she’s done with her house. (Her bathroom makeovers are GREAT!)

I’m SO sorry for the extra step! I know the whole reason for subscribing was to make things easy breezy…. but I promise, It WILL be moving forward! 🙂

From the bottom of my heart – Thank you!  You guys are the reason why blogging is so fun for me!


Wine Bottle Tiki Torches

I think it’s safe to say the holiday season is OFFICIALLY upon us. My local Walmart and Target have officially condensed Halloween and Thanksgiving decor into one aisle and Christmas has TAKEN OVER. I think it’s funny how the stores waste NO time capitalizing on Christmas. I wouldn’t be surprised if Walmart has a Christmas tree on display at the front door within a week or so. Insane!

Annnnnywho… if you’re like me… holidays = wine. …and I’m always game for repurposing items…. so when I saw this idea last year to reuse wine bottles, I was SUPER excited. I’m sure lots of you have seen it around, but just in case you haven’t, I couldn’t help but share the genius!  I forwarded the picture to my Dad and what do you know….. a couple months later he showed up at my house with enough supplies to make 6!  Wasn’t that UH-mazing of him?!

This is the second post in a row that one of my family members has made for me. What can I say… I come from a long line of craftiness. 🙂 So for those of you with kiddos… get them involved with making things… it’s amazing how it will stick with you later in life.  Ok – that’s it for Hallmark moments in this post. Lets get to work.

Wine Bottle Tiki Torches

Step One – Drink a bottle of wine…. or MANY bottles of wine depending on how many torches you want.  Give me a ring if you need help with this part. I’d be happy to help. Yup… I’m nice like that.

Step Two – Follow the instructions at this kick butt site.  I did take step-by-step photos with the extra pieces my Dad gave me, but my lack of technical terminology would just make you sound as silly as I do if you had to ask for help finding fittings at Lowes! By now I’m pretty sure all of the employees there have realized I’m a bit off my rocker…. I know for a fact the Lumber guys have!

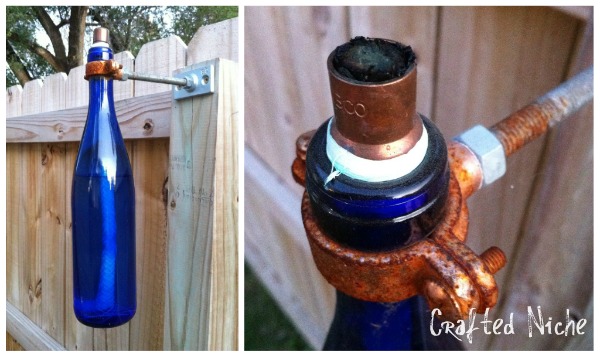
I hate to waste step-by-step pics… so here’s proof that I took them!  …..BUT remember…. check out this site for the play-by-play.

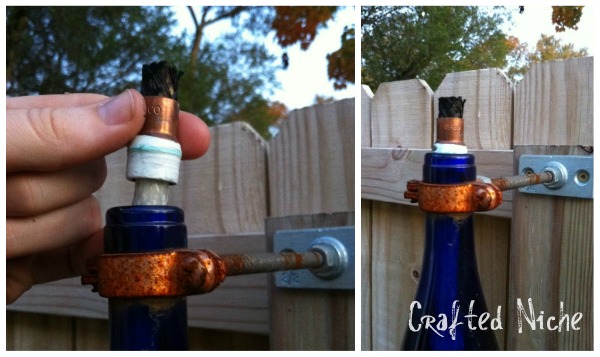
After you mount the plate to the fence or post, you’re ready to fill the bottles with oil.  Fit a wick into the copper plumbing tape piece and work that into the bottle mouth. Then slide the bottle neck into the mounted collar and tighten.  After a few minutes, light the wick and enjoy!

The photos below were taken after the wine bottles spent a season on the fence. You’ll see rust and the tops of the burnt wicks. Just keeping it real! I think if you sprayed the fittings to seal/waterproof them you might be able to slow/stop the rust if it’s not your thing. Doesn’t bother me one bit though!

I love them!  Definitely an easy projet that will be a great conversation piece for your yard. I went with all blue bottles, but it would look great to mix it up with different shapes and colors too.

Have a great weekend everyone!  …and start saving those wine bottles!

Ornament Light Tutorial

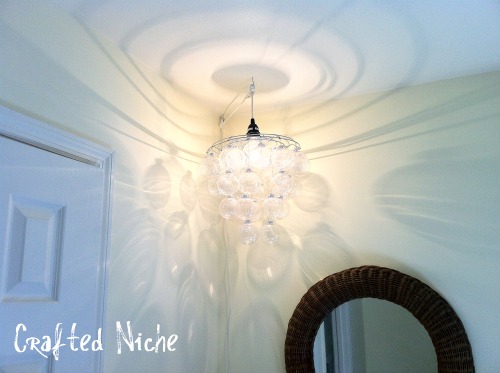
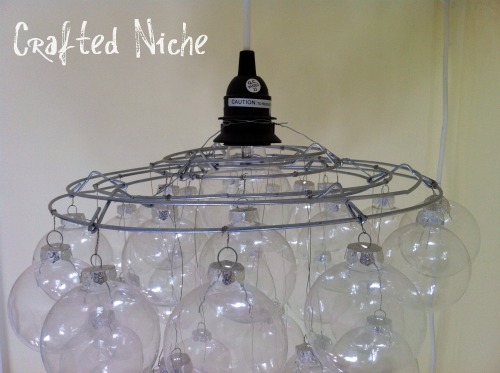
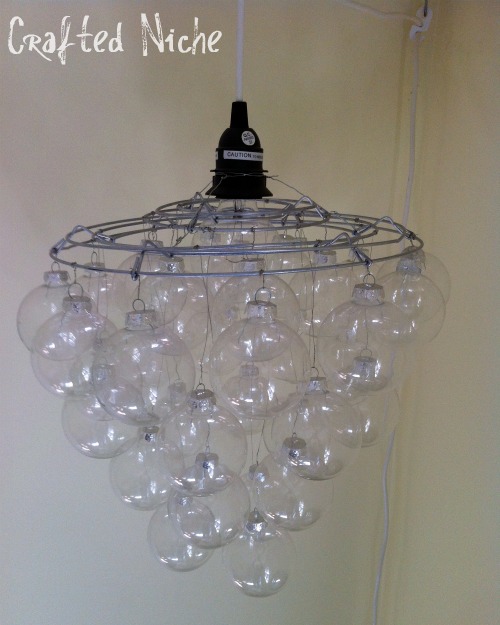
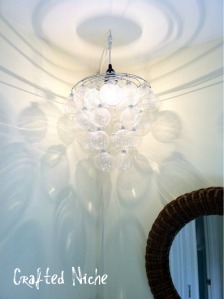
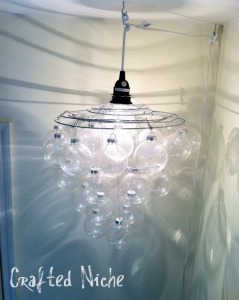
A few posts back I showed you a quick shot of my ornament light at night. My sister Christy made it for me as a birthday present earlier this year. Isn’t she a sweetie?  There are several versions splashed around Pinterest, but we had several of you ask how to make one like mine (aka hers) so here you go!

…and SPECIAL THANKS to Christy for being kind enough to tell us how!  Without further ado – here’s Christy’s first guest post on Crafted Niche!  (cue the applause)

How to make your own Ornament Pendant Light

Supplies:


Hi, Everyone! So apparently there’s some interest in the bubble light that I made. First, I should say that I’m not the first one out there to try and make a DIY version. I’ve seen quite a few on Pinterest and thought I’d give it a go. I don’t have in progress” shots because my sister didn’t have a blog at that time and I wasn’t even sure it was going to work. So, feel free to ask if you have any questions. But basically, I just used a lot of wire and crossed my fingers!

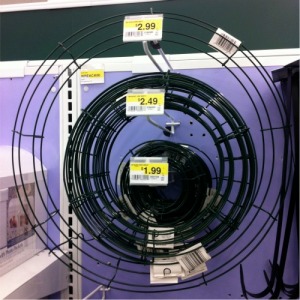
I started off by spray painting the florist rings with Rustoleum brushed nickel. It matched the top of the ornaments and the wire.

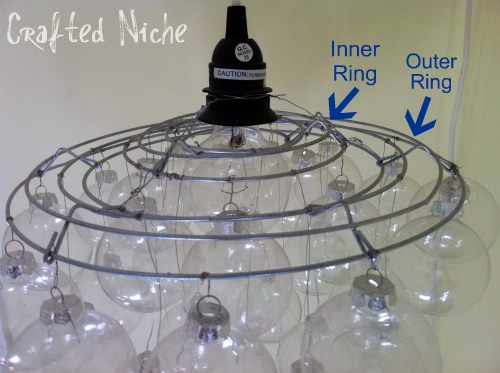
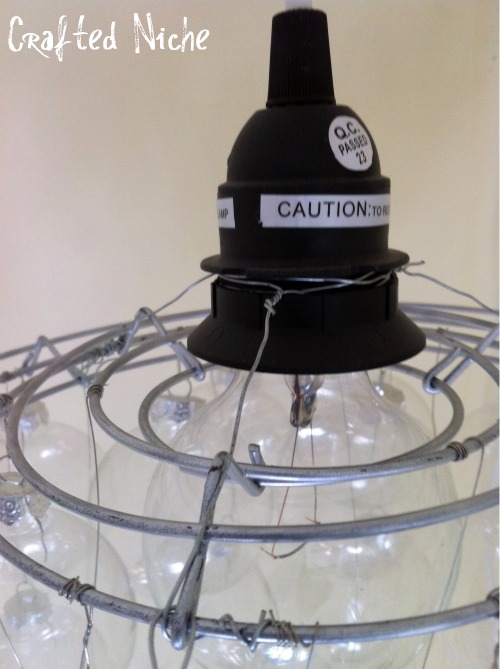
Then, I just wired the two florist rings together. These are what the ornaments (or bubbles) hang from. I wanted the bubbles to be uniformly distributed, so the wire rings gave me guides to know where to hang the wire from for the ornaments. I also used the wire to attach the light socket into the center of the inner ring.

I then hung the ornaments from the florist rings starting with the outer ring so that I didn’t have to guess on the length for the inner since I wanted the inner ring to hang down the furthest to help hide the bulb later on. So, I went around once on the outermost ring of the florist ring. Then, I made the next inner row one ornament height lower. I continued this until I got to the innermost ring.

At first I used a regular bulb and didn’t like the look. I tried a CFL and REALLY didn’t like the look. Then, I remembered that I had some extra clear, round bulbs that were used in my old vanity light. Actually, it was shaped just like the ornaments so it was perfect!

Hang the light from a hook in the ceiling and there you go! Super easy.

–  Christy

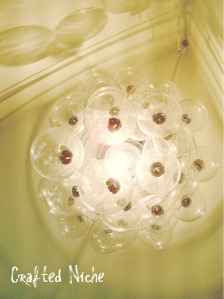
THANKS CHRISTY!  I took about a million and a half pictures of the light in my guest room. Here are a few more… and true to Dana form, I’m giving you more pictures than one person could possibly want. 🙂

Click for larger versions.


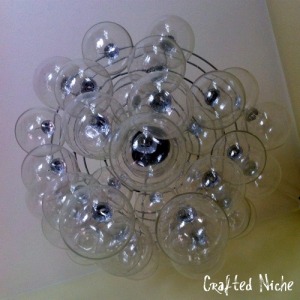
(Looking UP from under the light)

This might be a good project for you to tuck away for after the holidays!  Be one of the first to hit up your local stores the day after Christmas and you’re sure to score a DEAL on some ornaments!

Enjoy!

Be sure to check out all the great Link Parties where I’m linking up!


Joining the fun in the Fall Pinterest Challenge!

Big thanks to the following blogs for creating such a GREAT challenge!

Sherry @ Young House Love
Katie @ Bower Power
Ana @ Ana White
Erin @ House of Earnest

Tea Tier, Shopping and a Guest Post

Happy Monday all.  What’s that?  You’re about as thrilled for Monday as I am?  Good… well at least we’re in it together. 🙂

First and foremost, I’m thrilled to say I’m guest posting today at Nifty Thrifty Things. Vanessa is away for a bit enjoying a vacation (CLAP CLAP CLAP CLAP) deep in the heart of Texas! Be sure to stop by her neck of the woods and check her out!

…hahaha sorry… I just wasted 30 seconds of your life… but that’s what I sing in my head every time someone mentions Texas!

Back here at Crafted Niche….. Happy Halloween!  I didn’t really do much Halloween-specific decorating this year. I got some pumpkins, but that’s about it. I’ve decided not to carve them though in hopes of them lingering a bit longer on the porch. I just love fall and a few pumpkins on the porch really seems to dress up my DEAD front yard. Seriously… my grass has been dead out front for at least two months. No mowing…. good thing. No green….. bad thing.  It’s a trade off. Remind me again why we don’t all just astro-turf our yards???

Anywho… Saturday I ventured out!  I headed to the big o’ city for a couple reasons:  1)  Sell that cute pedestal table I showed you last week to a lady from Craigslist and 2) Hit up my triple-threat:  Home Goods, JoAnn Fabrics and Hobby Lobby. Booyah.  Did I mention my JoAnns and Home Goods are across the street from each other?  …and Hobby Lobby is just a couple miles down the highway to the next exit?  Love it!  Best part is, you’ll be SHOCKED to know I only spent $18 TOTAL at all three stores.

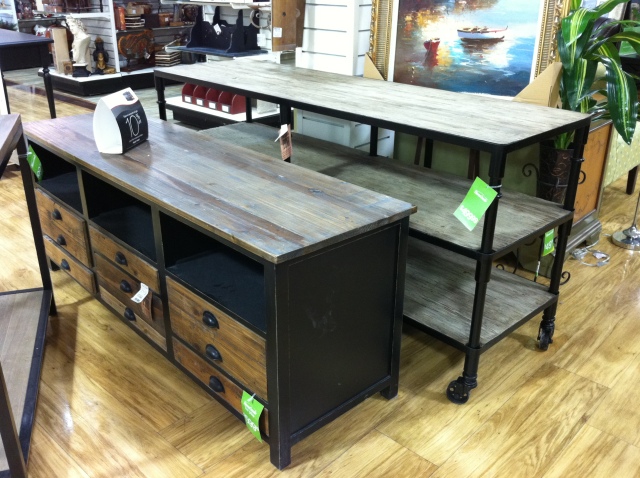
Home Goods was, as usual, fannntastic. From the minute I stepped in the door I was getting whiplash from looking back and forth. Kid in a candy store… this girl!  I’ll spare you the bajillion pictures I took and show off just a couple pieces that had me SMITTEN!

See the piece in front?  I can’t help but feel like I saw the exact same thing on an HGTV makeover show. It was gorgeous! …but for $599 we’ll just have to have a long-distance relationship. I will love him from afar.  Same goes for that cart behind. It really got me thinking… could we find older carts and simply swap out the shelves for something more worn with character?


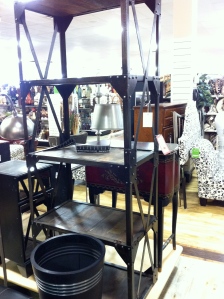
Check out that shelf on the left. I practically climbed over top of a row of chairs when i saw this guy. He had a clearance tag on him and I just HAD to see if I could have him. ….but for $399… he’s ALSO going to stay put. Sigh.  BUT!  Why couldn’t we get a similar look for less?  Black metal structure with plenty o’ bolts… add in some rustic, weathered wood.  Done!

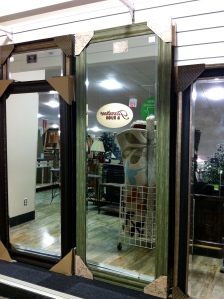
The photo on the right is of the prettiest leaning mirrors I’ve seen yet. I know the scale is hard to judge by the picture, but it was a LOT taller than most. See the mirror to its right?  Well that’s pretty much the standard height I’ve seen in most stores. But not my Hulk… that big ol’ gorgeous green man stood MUCH taller and made a bigger statement. At $99 the price was doable, but I’m cheap. What can I say. 🙂

I kid you not. Just last week I pinned the greatest DIY clock over at Dittle Dattle.  Check it out here.  The clock above in Home Goods stood about 3 feet tall and reminded me so much of Carrie’s version!  She gives a great how-to.  Be sure to check it out if you’re in the market for a big clock!   (…or go to Home Goods and score that beauty for around $80)

After Home Goods I popped in (for an hour! eek!) JoAnn Fabrics and walked out with three things for my next project. It’s INSANE how many ideas I have in those stores. I just go crazy snapping pictures to remind me of the different projects I’d like to make. Halfway through the store my arms were LOADED. I had to give myself a responsible-crafter-reality-check and put down all of the things I wouldn’t be using in the VERY near future. I decided I should wait to buy them until I’m actually READY to work on those ideas. So thankfully I walked out of the store spending only $7 for three things.

Then on to Hobby Lobby. Same story… different store. That place is DANGEROUS. No…..I’m not referring to the wood carving knives… I’m talking FINANCIALLY dangerous. I want everything. I wander around dreaming up ideas and wishing I had all the time and money to do them. I grabbed the last remaining piece for my next project and also picked up a couple bonus items.

So the bonus items?  Well…… they were an acrylic paint pen in black annnnnd THIS guy:

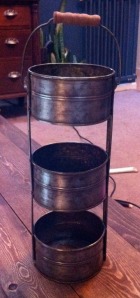
I found this galvanized piece back in the floral department and it just so happens all metal schtuff was 50% off! Woop!  After the discount I scored him for $3.5o… and he was perfect for what I had in mind…

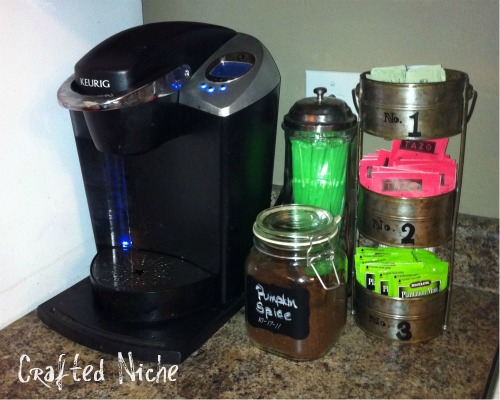
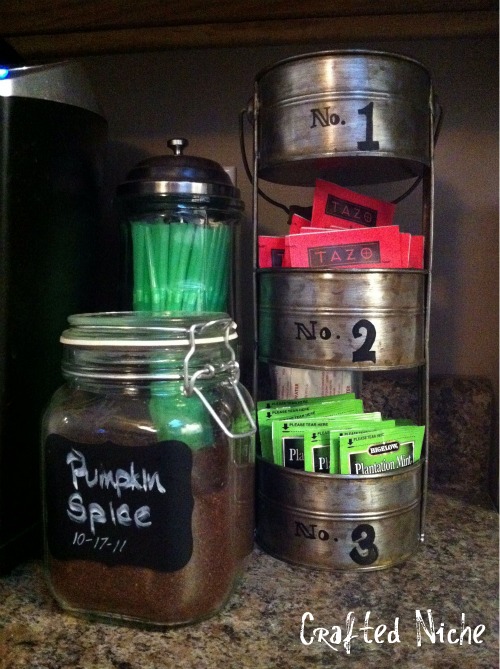
I love coffee in the morning… and hot tea during the day. I was so sick of having to dig in the cabinet for my tea and thought something a bit cuter and accessible would do the trick. I used my acrylic paint pen to free hand some numbers on the metal. I know… it would have been MUCH cuter to actually stencil them on… but sometimes you just want to get it done quickly right?  It’s the PERFECT height to fit under my kitchen cabinets but still be able to easily reach inside the top tier for sweetener. Loving it.

Who knows… maybe I’ll sand off the numbers a bit to make them look worn. OH… and that glass jar filled with coffee is from Michaels. I bought the jar and then slapped a chalkboard label on the front. I like to write the coffee flavor (and day the bag was opened) on the chalkboard.   …and this girl HAS to have her straws. I’m addicted… Use them for water and whatnot though. I’ve just found I drink a lot more if I use a straw!

My sister Christy wrote a GREAT tutorial for you guys on how she made the light I showed you a couple Fridays ago. I’ll try to get pictures tonight and get that to you as soon as I can.

Hope you all have a wonderful Halloween.  Be safe!

A Finishing Touch for Roxy’s Bed

Confession – I’ve been sitting on this for a while now. Seems I’m BAD about that. I buy (aka hoard) when I find a great deal and then things sit until I get a sudden burst of motivation. Case in point:

I bought a cute vinyl decal on clearance at Michaels MONTHS ago. At the time, I thought I would find an old board to put it on or stick it directly to the wall above my window. The longer the decal sat on my dresser (see! I didn’t even put it away!), the less I liked the idea. I thought paint would look better on an old board and I was afraid the decal would be too small for the scale of the window.

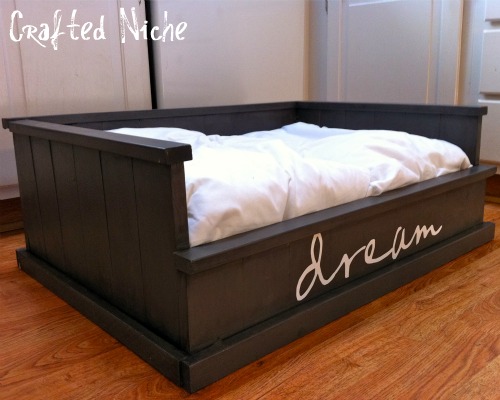
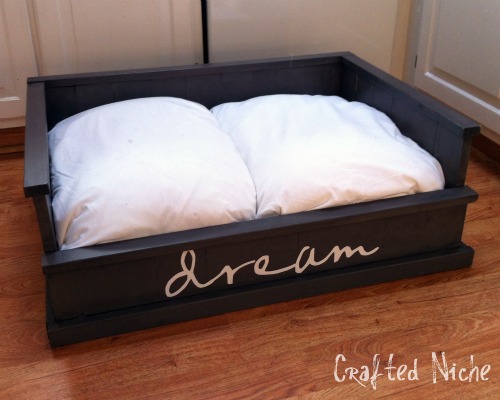
But wait – Plan B (or C?) – What about putting it on Roxy’s bed that I built earlier this year?  I held the decal up to the front of the bed and it was a PERFECT fit.  Don’t you just love when things work out like that?!  So of course I did just what you’re expecting, right….. put it on Roxy’s bed while I had it out?  WRONG.  I put it back on the dresser for another few weeks.  (I swear, I have a problem!)

Fast forward to today… Finally got motivated.  Took me long enough! While my Mom may not be nearby to make me clean my room, I still do just fine throwing a fit about it alllllll by myself! I put my big girls pants on, dug through the MOUNTAIN of laundry and made my way to the dresser.  After reading the instructions twice (I’m a decal newbie) I slapped that bad boy on the bed! (there might be a better way to say that… but let’s just roll with it)

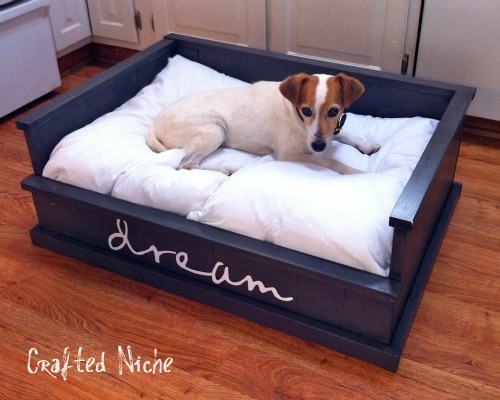
Yup… that’s a dog bed in the kitchen. Normal? Nope. But it was the best natural light I could find thanks the the skylight.

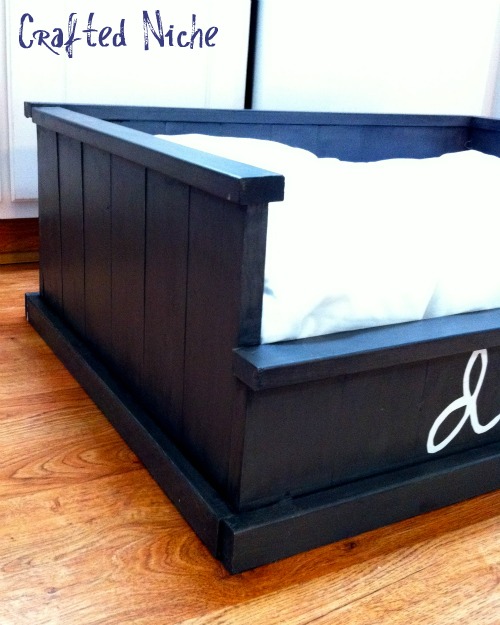
It’s definitely NOT perfect… but it was the third thing I ever built… so I’m pretty happy with it.

The bed was strategically sized to perfectly fit a couple of cheap $2.50 bed pillows at Walmart… which strategically fit in el cheapo waterproof pillow covers.

I love that it looks hand-painted. I think it goes well with the look of the bed.

Roxy likes to make sure EVERYONE knows it’s HER bed.

…and fair warning. You could probably stop scrolling now… because all you’re going to get now are pictures of Cutie Patootie Roxy with the bed in its normal spot….

……

…..

….

..

.

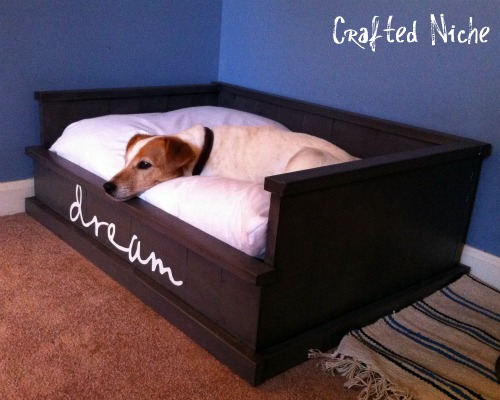
Still scrolling?  Okay!  You’ve been warned.  Here are a few too many pictures of Roxy lounging in “her spot” in the bedroom:

That’s a water bowl to her right. If Queen Roxy wakes up in the middle of the night and wants something to drink, she’ll pace around the bed and growl until I get up and get it. So filling HER water bowl is MY sleep aid.

After 14 years of my photo sessions, she’s less than amused!

Awww

LOVING this decal!

Roxy is officially OVER it. Doing what she does best… SLEEP.

If you’d like to see how I built this bed, check out the original post!

Have a great weekend everyone! I’m hoping to get a lot of cleaning and laundry done. Here’s hoping I find the MOTIVATION.

.

Be sure to check out all of the amazing link parties in my side bar! and special thanks to Home Stories A2Z!


Joining the fun in the Fall Pinterest Challenge!

Big thanks to the following blogs for creating such a GREAT challenge!

Sherry @ Young House Love
Katie @ Bower Power
Ana @ Ana White
Erin @ House of Earnest

How to make Silhouette Prints using Picnik

Ask and Ye Shall Receive! Thank you so much for all of your sweet comments about my Encyclopedia Silhouette Prints. I absolutely love hearing from each and every one of you and your comments always make my day.  Thank you, THANK YOU for making blogging SO much fun!

So the nitty gritty side of the Encyclopedia Prints… Let’s show you how to take your pictures from this to this:


It’s okay. Take a deep breath. It’s EASY.  I promise!

If you haven’t done so already, you need to sign up for an account at Picnik.com  The freebie version will be JUST fine for what you’ll need for this project.

Once you’ve done that, pick a photo you’d like to use for your silhouette. The fewer fuzzy wuzzy flyaway hairs the better. Trust me, it’ll make your life so much easier. (Maybe I’m just lucky having three smooth haired dogs… even if they DO shed!)

Upload your photo to Picnik and we’re ready to get started!

Under <BASIC EDITS> you have the option to CROP your image. Get it situated jussst how you like it and then we’ll start working on making it into a super posh silhouette.

Cropped?  Good. Lets go.

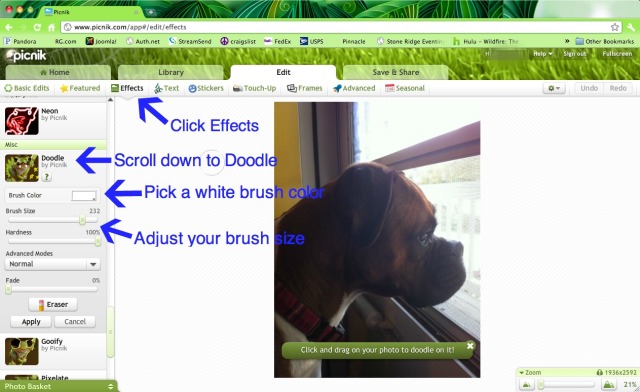
  • Click on <EFFECTS> in the top tool bar
  • Scroll down through the list of effects on the left. Shortly before the bottom you’ll find DOODLE.  Click that!
  • Change your brush color to white
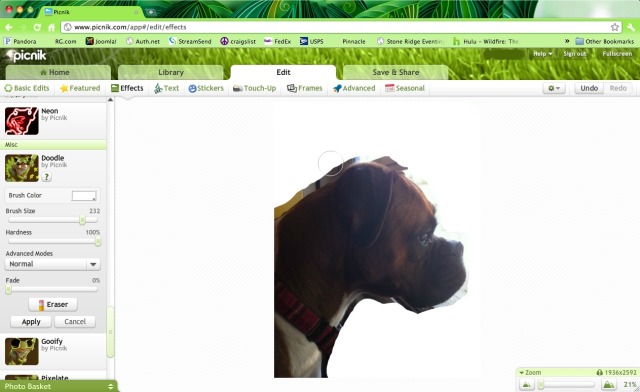
  • Adjust your brush size. I like to start with a big brush for coloring the background

  • Using the DOODLE effect, color out the big, obvious, gotsta-go background. Don’t start on the detail work yet… just get rid of the background until you’re left with something like this:

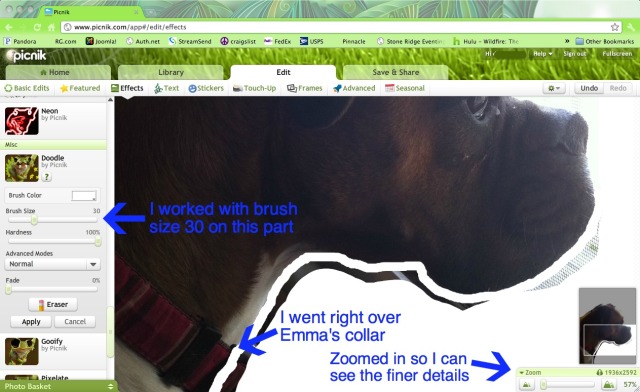
  • Now is when I like to change my brush size to something quite a bit smaller and start working on the outer edge of my subject.
  • GO SLOW and work in shorter brush strokes.
  • UNDO is in the top right corner of the screen and it will quickly become your best friend for correcting bad “doodles”
  • The smaller the brush, the smoother the lines
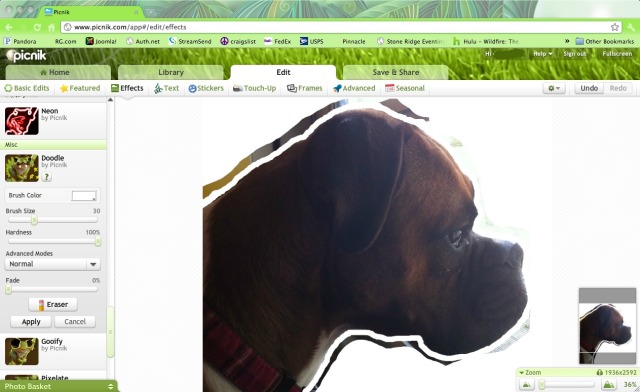
  • ZOOM in on sections – you’ll find the zoom in lower right hand corner. VERY helpful
  • Don’t be afraid to doodle right over things that make your outline awkward… like Emma’s collar!

…and you’ll be left with this:

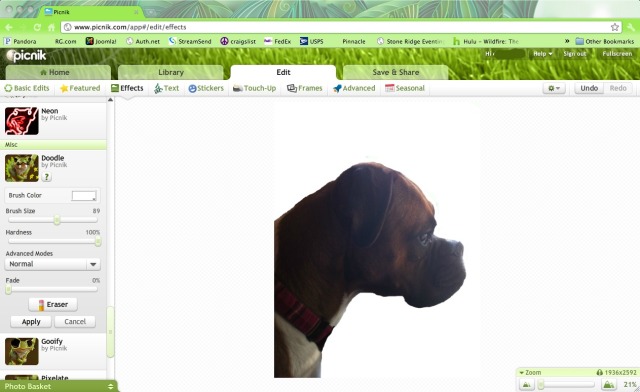
  • After doing the edging with the small brush I like to increase the brush size again and color in the rest of the background
  • When you’re done CLICK APPLY on the left
  • …and it should look something like this:

Now comes the fun part. Lets make it a flat black and white print!

  • Click <BASIC EDITS>
  • Click <EXPOSURE>
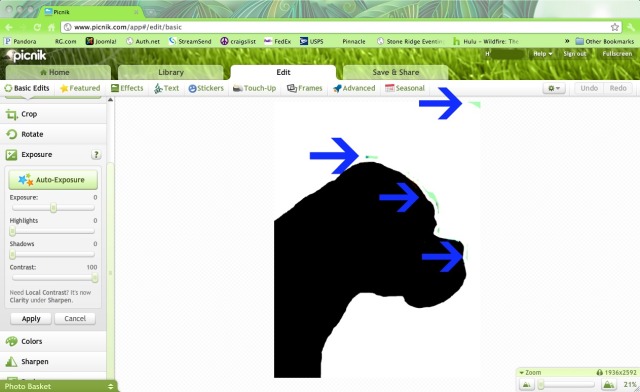
  • Click <CONTRAST> and slide the bar all the way to the right.
  • Click APPLY

If your image isn’t completely black and white, don’t fret. We can fill in with black or add more white.  The important part is that your border is accurate!  Here’s what mine looked like after this step… and all those blue arrows are pointing out the things I need to touch up.

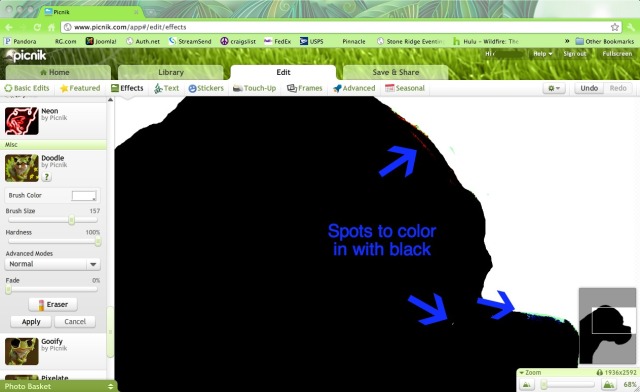
  • Go back to <EFFECTS>
  • Scroll down to DOODLE and color in any of the white background that you’ve found.
  • ZOOM IN and pan around. You’ll be amazed what you find when you zoom in.
  • After everything in the background is white, change your brush color to BLACK and fill in any spots on the subject.  When I made Roxy’s (the white terrier) print there were several larger areas I had to color in with black in the middle of her head. It was easy though! With Emma below, you’ll see there were areas along the edges that needed to be touched up. Remember…. ZOOM IN!

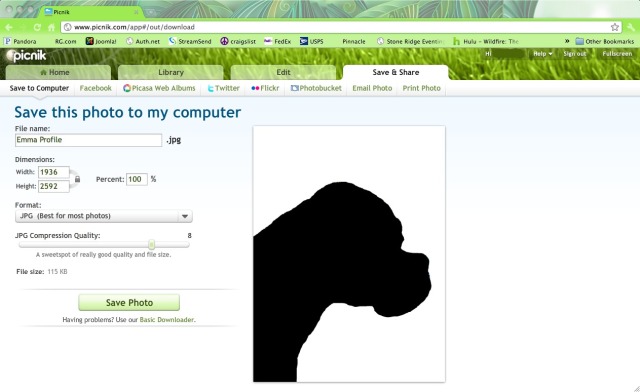
…and after all that:

  • Click  <SAVE & SHARE> tab at the top and save the photo to your computer.
  • Tuh-Dah!  You’re finished!!

You’ll have to cut me some slack… I did this one quickly for the tutorial so Emma’s head is a bit lumpy.  As I said earlier,  just go slowly and use shorter brush strokes in case you need to UNDO. If you use longer strokes, then you’ll lose an entire line if you make a small mistake at the end. (Trust me… VERY frustrating)  I got so MUCH faster as I went so don’t give up if it’s hard in the beginning. By the time I got to my 4th silhouette I was zipping right along!

At this point I was able to just open the image and print it directly on a standard paper size… which actually was my encyclopedia page cut to fit.

I think it would be ADORABLE to print silhouettes directly onto cute scrapbooking paper for an easy way to bring color and/or pattern into a space. Just don’t choose something super dark or it will show through the ink. Maybe something with a simple burlap print would look nice?

Hope this helps and if I’ve forgotten anything please don’t hesitate to leave a comment with your questions!


FOR THE FULL PROJECT RUN-DOWN CLICK HERE!


Be sure to check out all of the amazing link parties in my side bar!  and special thanks to Home Stories A2Z!

Let’s play a game….. I spy….

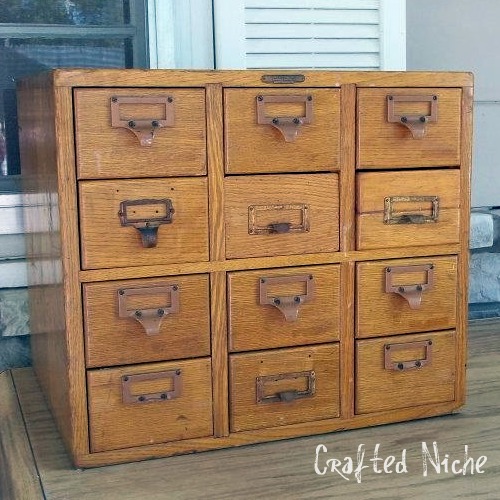
a CARD CATALOG!

…picture me practically jumping out of bed last night when I spotted this guy on Craigslist!

The card catalog was for sale in Springfield, MO, a few hours away, so I emailed my Dad in Branson.  Just so happens he was considering heading up to Springfield to look at a Craigslist leaf blower today!  Random coincidence… Score!

{Thinking in my head:   I really, really, LIKE REALLY  want a LARGE card catalog, but maybe this little booger is a stepping stone to the big one? Beggers can’t be choosers. }

BIG THANKS to Poppa Bear for driving to Springfield, MO to check it out!  He pointed out a couple things that were tough to see in the photo:

  • There are two different kinds of pulls… and two of them are broken. I’ll have to invest a little in new hardware, but I think it will be worth it.
  • A couple of the drawers slide in a bit deeper when pushed back in place. This should be easily remedied by adding a small piece to the back of the drawer.

…..aaaand he negotiated for a cheaper price. LOVE IT!

I won’t be able to get my hands on it for a while (we live HOURS apart)…. so for now, I’m left to ponder:

  1. Sand down / stain a darker shade OR try the Restore-A-Finish products I’ve been reading such great things about?
  2. Maybe add legs to make a side table?   (I love side tables almost as much as I love tote bags)
  3. Leave it as is? Just scrub it up and replace the hardware?

Decisions decisions!  All I know is this girl is pretty pumped right now. I’ll take more pictures to share once I have it in my hands. For now we’ll all just have to make do with the seller’s photo.

OH!  And I’m trying to work out a deal on another much larger card catalog-esque piece on Craigslist. It’d be a definite makeover project and I’m really hopeful I’ll be able to share it with you!  PLUS – odds are it would end up FOR SALE when I’m done (just in case any of you are near St. Louis, MO).  Fingers crossed!

I’d LOVE to hear your thoughts! What do you think I should do with this piece?

~~~~~

and before I leave… random tip time –

If any of you have an iPhone, I have to tell you about my favorite Craigslist app!  There are some oddball things, like card catalogs, that I search for on a regular basis.  This app allows me to search several markets at once AND even save my searches so the next time I just have to tap the search and let the app do the rest of the work. PLUS – if you want to know right away when something you’re hunting down is posted, it will even send you notifications. BRRRILLLIANT!

What is this app you say?   CraigsPro+

I think right now the App store is calling it something long winded… to the tune of “Craigslist + Notifications. CraigsPro+ Craigslist + Photo Wall + Posting + Photo previews”   Yeah… seriously… that’s the name. Overkill? Me thinks so. They’re charging $1.99 for the app, but if you love Craigslist hunting like I do, it’s more than worth it!

Here’s the current icon for this gem of an app:

Source: Apple iTunes App Store

Hope you guys love it like I do. Just a helpful tip from one Craigslist addict to another!

Pedestal Side Table & a Knock Off Feature!

This reveal is LONG over due! I’m so sorry for not posting sooner. I finished this piece and set it aside… and after deciding to put it for sale on Craigslist, I FINALLY took some “after” pictures!

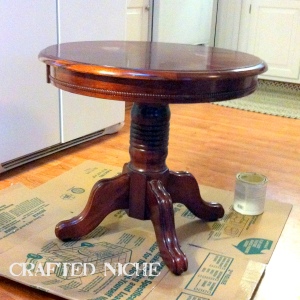
Here’s the before:

I found this little gem at a local thrift shop. Standing 22in tall and 25in across, it was solid, sturdy and ready to go. It sat unpainted for a bit, but I just couldn’t shake the call to paint it. I had a can of Annie Sloan Chalk Paint calling my name!

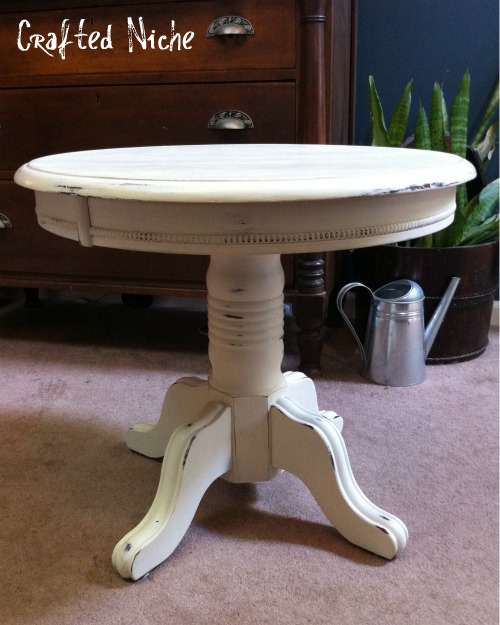
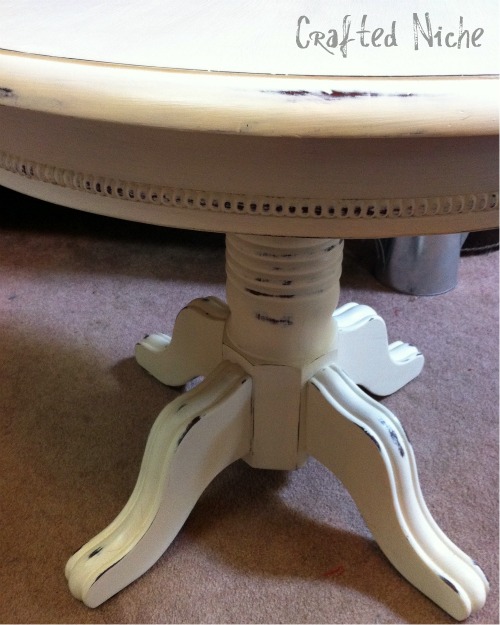
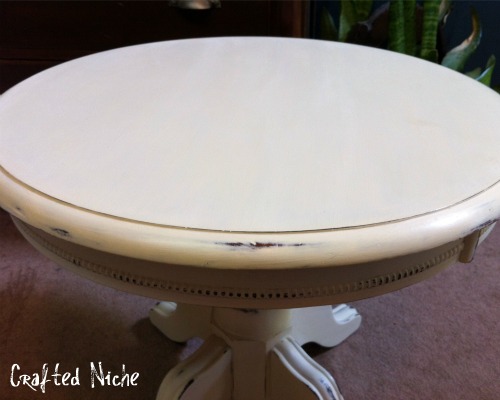
….and here she is today after 2 coats of Old White, distressing and Annie Sloan clear wax.   (…and yes, you read right.  NO SANDING or prepping… with ASCP you just start painting right over the existing finish!)

I absolutely LOVE how easily Annie Sloan Chalk Paint distresses. Seriously, it comes off like chalk dust. If you haven’t tried it, I highly recommend it.  …and if you want the nitty gritty – here is the post from way back when I first started on the table: Annie Sloan Chalk Paint on a $7.50 Side Table


Be sure to check out all the great Link Parties where I’m linking up!


OK – Next order of business.   BIG NEWS tonight!   Knock Off Decor is featuring my Ballard Designs Inspired Spool Table tonight!  Be sure to stop by Knock Off Decor to check out all of the other AMAZING projects. It’s a one-stop-shop for how-to’s straight out of the catalogs!

Knock Off Decor Feature  –  Crafted Niche’s Spool Table


http://knockoffdecor.com/

Encyclopedia Page Silhouettes

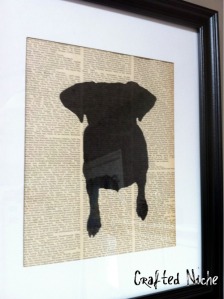
Black silhouettes printed on book pages – I LOVE THEM!  I saw the photo below on The DIY Showoff‘s Pinterest board and knew immediately what I wanted to do…

Ok, I’ll admit…. my eye was drawn to the horse… but I wanted to put my own spin on it. MY HORSE! …and then I took it a step further….  actually… THREE steps… Roxy, Quinn and Emma…
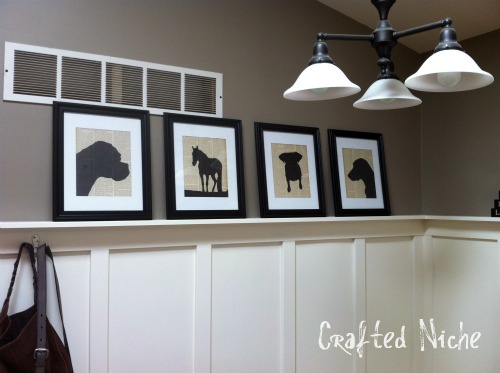
….if my house weren’t already a dog/horse shrine… I’d say it is now. Definitely going to have to swap out some artwork in the GALLERY WALL now!

Here’s a breezy run-down of how they came together.

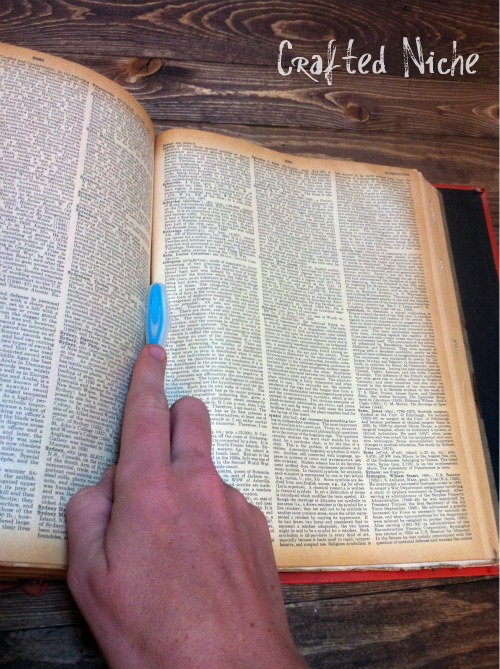
Step One – Cut out pages from $3 thrift shop Encyclopedia
Step Two: Edit photo using Picnik (free subscription will do just fine!).  Here’s the full run-down on how to do this step.

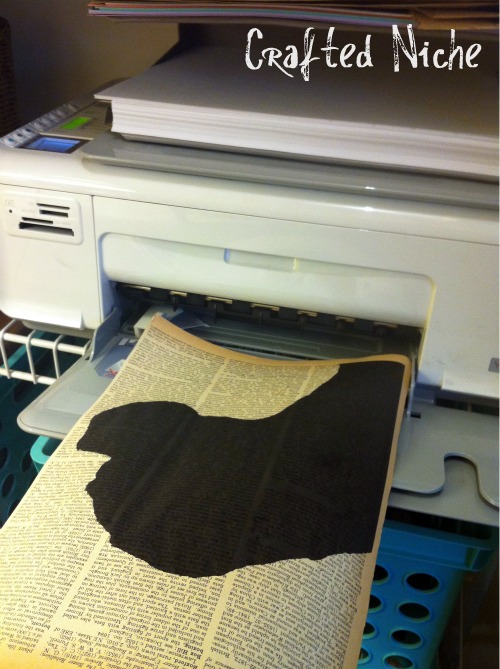
Step Three(ish): Trim paper to standard size and print image directly onto encyclopedia page.
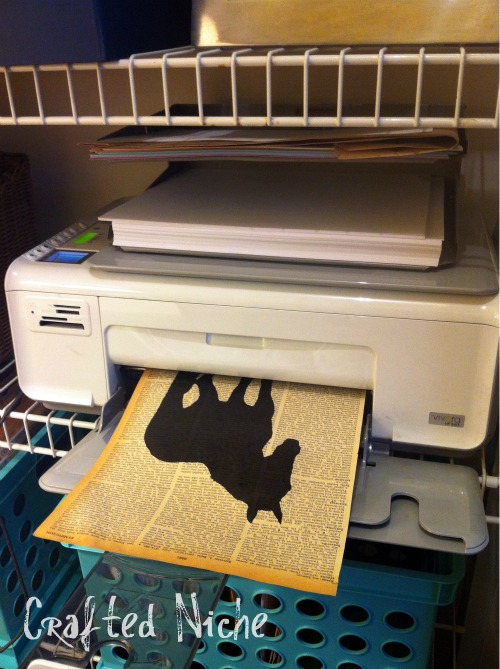
Step Four: Repeat process… under the scrutiny of your next subject. Yes… Emma crawled into my lap just as I was getting ready to print hers!

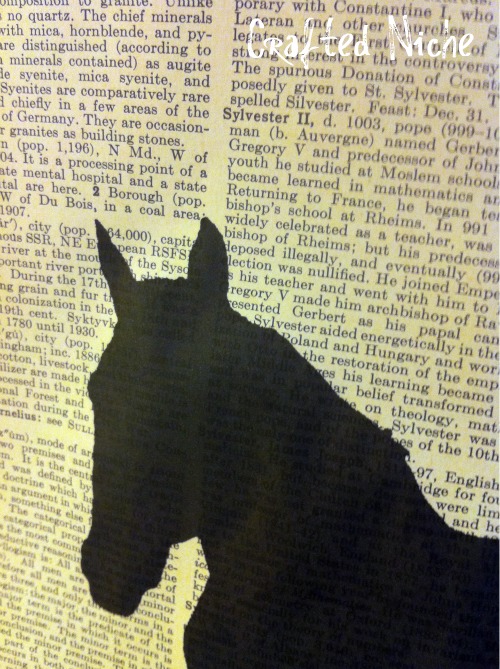
I put a little thought into the pages I chose for each pet. My horse is named Sylvester, so naturally I chose the page with his name right on it!
…for the dogs I wasn’t as lucky. Unfortunately, Emma, Roxy and Quinn weren’t listed in my encyclopedia… so instead I used Boxing (for the Boxer), Labrador (pretty self explanatory) and Terrier (for Foxy Rox).

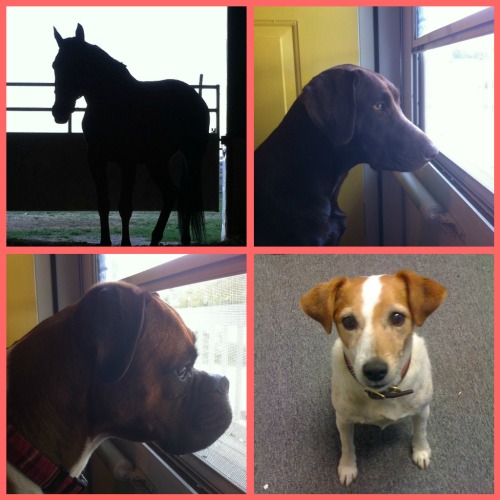
…and in case you’re wondering… here are the original photos:
….and my “after” silhouettes!  I tried to find pictures with easy to define outlines. Turns out squirrels in the front yard make the perfect distraction for labs and boxers while you take pictures of them!
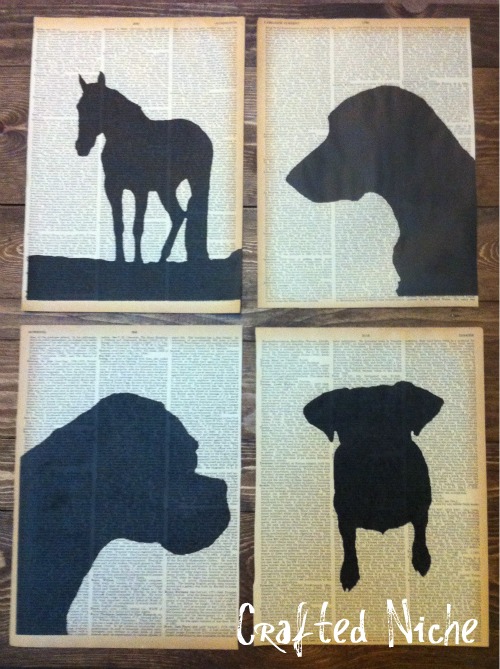
…and at this point, I was GIDDY EXCITED. My sisters received immediate texts of the photo above accompanied by “eeeeek!”  Yup…. THAT excited.

Now I will say, this post is more of a reveal than a How-To… but I’m MORE THAN HAPPY to share the nitty gritty if you’d like to make your own. Just leave a comment and let me know! I’ll GLADLY do another post that walks you through exactly how I made the silhouettes using Picnik.com!   UPDATE – THE PICNIK.COM HOW-TO IS NOW UP AND AVAILABLE!

I bought $5  11×14 frames at Walmart that came with an 8×10″ mat. PERFECT!  Now they sit happily on my ledge (from the Board and Batten) and I swoon when I see them.

Here’s a couple more shots of the dining space’s progress.

(Chair Makeover Here, Table Makeover Here, Board and Batten Here)

…and that air vent.  YEAH…. I’m working on that. Right after these pictures were taken I PROMPTLY removed it and am currently working on it to make it disguise a bit better.
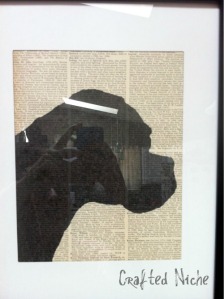
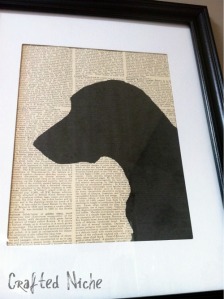


…note to self, take close-up photos BEFORE placing the prints behind glass next time. Glare! Grrrr

I hope you love them as much as I do!   Remember – if you want more info on the nitty gritty of the picnik.com steps, check this out.  I promise – it’s easy!

Hope everyone had a GREAT weekend. I’ve been working hard on building a banquette seat in the corner of my dining area and seriously can’t wait to show you. Give me a few days though… still have to finish trimming and painting and then recover the cushions.

…and as always, if you decide to make your own silhouettes I would LOVE to see your version!  Send me a link to your post or even email me a photo – craftedniche{at}gmail{dot}com  Who knows… maybe we should start featuring some of them HERE to help get people’s confidence and creativity going!

Be sure to check out all the great Link Parties where I’m linking up!

…and big thanks to Home Stories A2Z for hosting!

Amazingly featured at:

They are talking about me at CraftGossip.com


Joining the fun in the Fall Pinterest Challenge!

Big thanks to the following blogs for creating such a GREAT challenge!

Sherry @ Young House Love
Katie @ Bower Power
Ana @ Ana White
Erin @ House of Earnest

Glass Ornament Light at Night

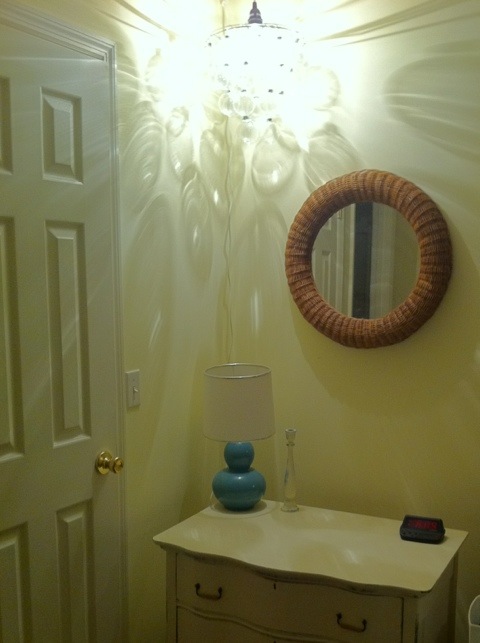
Love the way this light looks at night! Almost looks like bubbles on the wall. I think this would be adorable in a baby girl’s nursery.

20111021-181642.jpg

By the way… My sister made it! To see it in daylight check out the guest bedroom on my House Tour page!
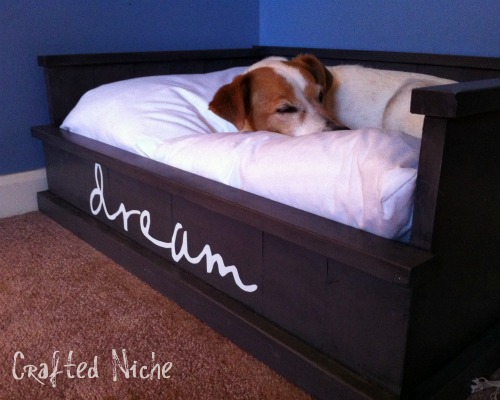
….and just leave a comment below if you’d like a How-To for it! I’m sure we could talk her into it!
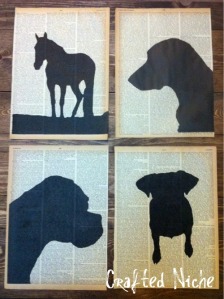
….ps. Please excuse the poorly styled dresser!